Setting up Cloudflare R2 for Custom OTA Updates
This guide explains how to set up custom OTA updates for your Evolution X unofficial builds, using Cloudflare R2.
Why Cloudflare R2?
Compared to SourceForge, Cloudflare R2 provides superior download speed across regions. This will help your users to download updates much faster.
Please note that Cloudflare R2’s free tier only includes 10GB of storage each month (and about 1 million web operations too, but you won’t use that much anyway). This guide will only cover for setting up OTA for latest build; use SourceForge to actually store your previous builds if you want.
Prerequisites
- An existing Cloudflare account.
This guide will assume you’ve already set up payment for your Cloudflare account (so you’re able to use R2 Storage Bucket feature).
- rclone , which is used to upload builds to R2.
Steps
➕ Create an overlay in your device tree
system_updateSetting up custom OTA: Create an overlay in your device tree🏭 Set up R2 bucket in Cloudflare
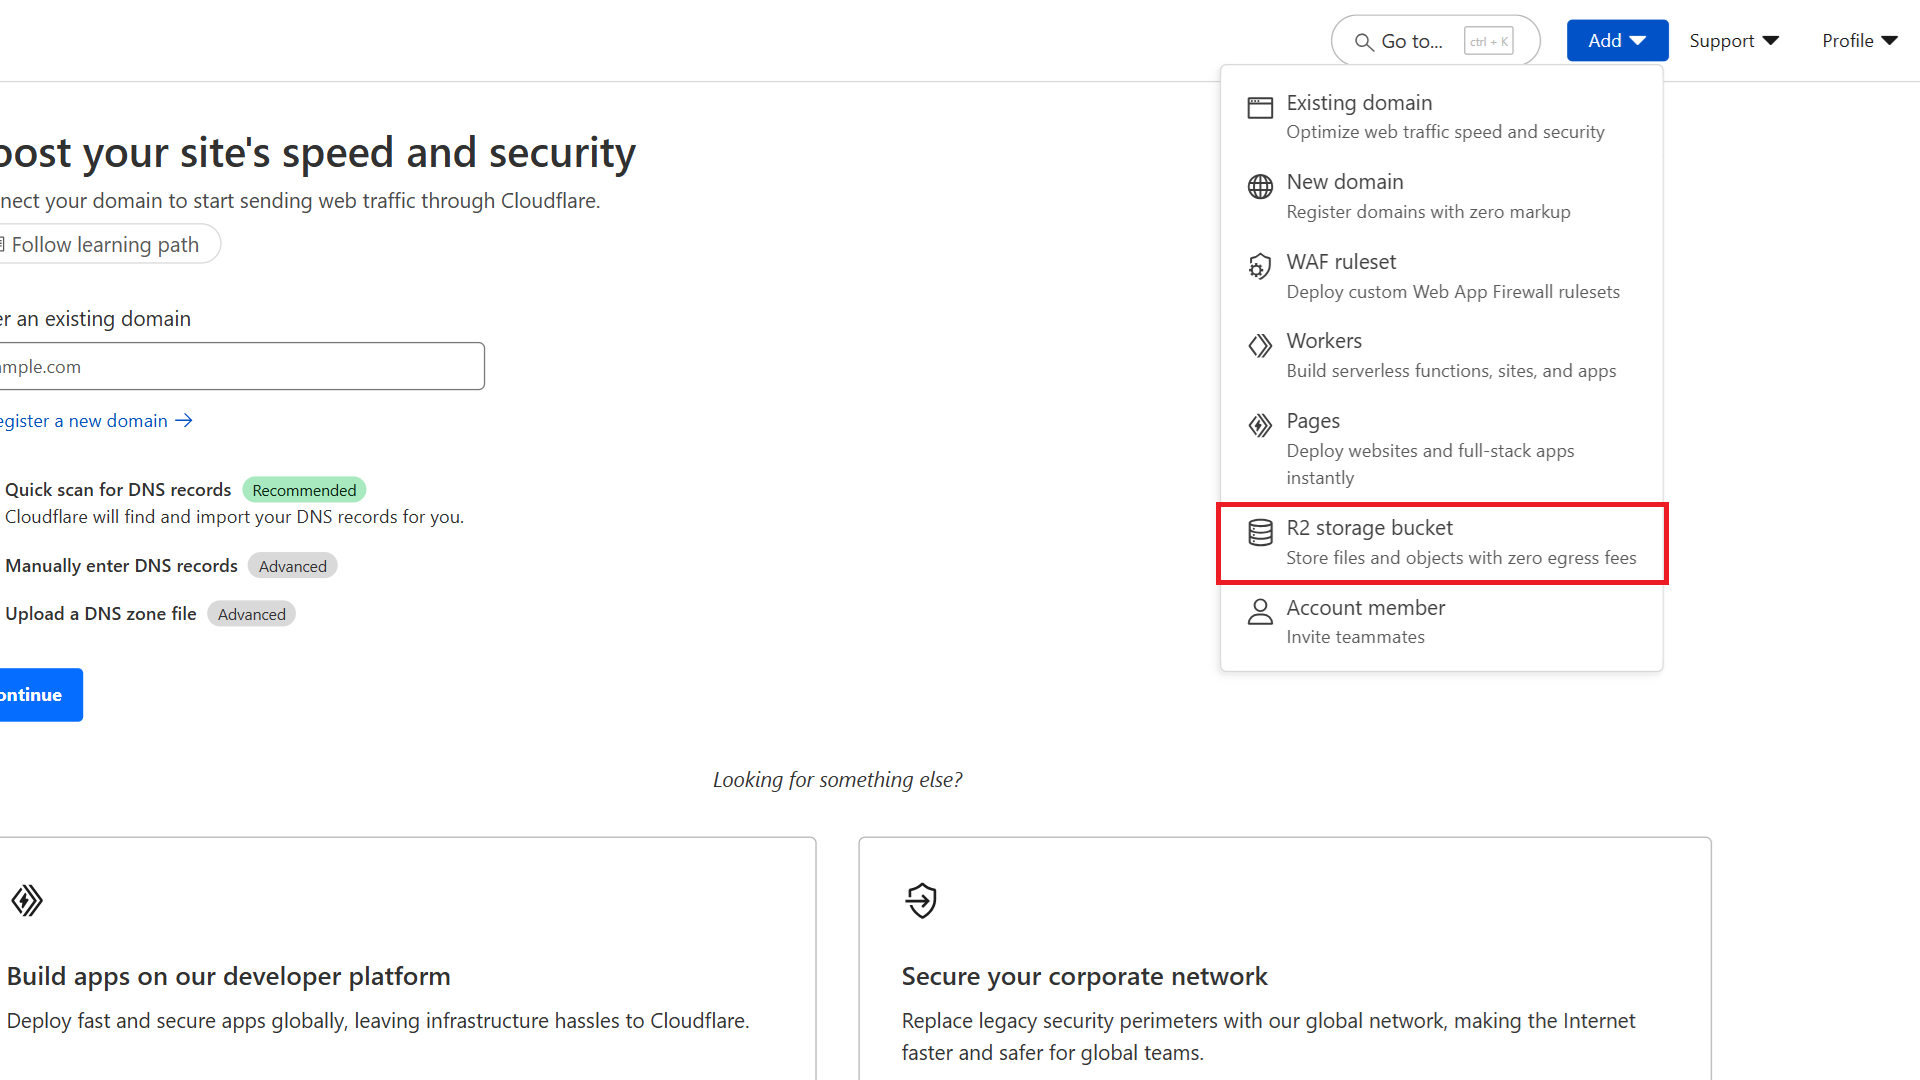
Visit Cloudflare Dashboard and login to your account. From the top right of the Account Home page, click Add > R2 storage bucket.
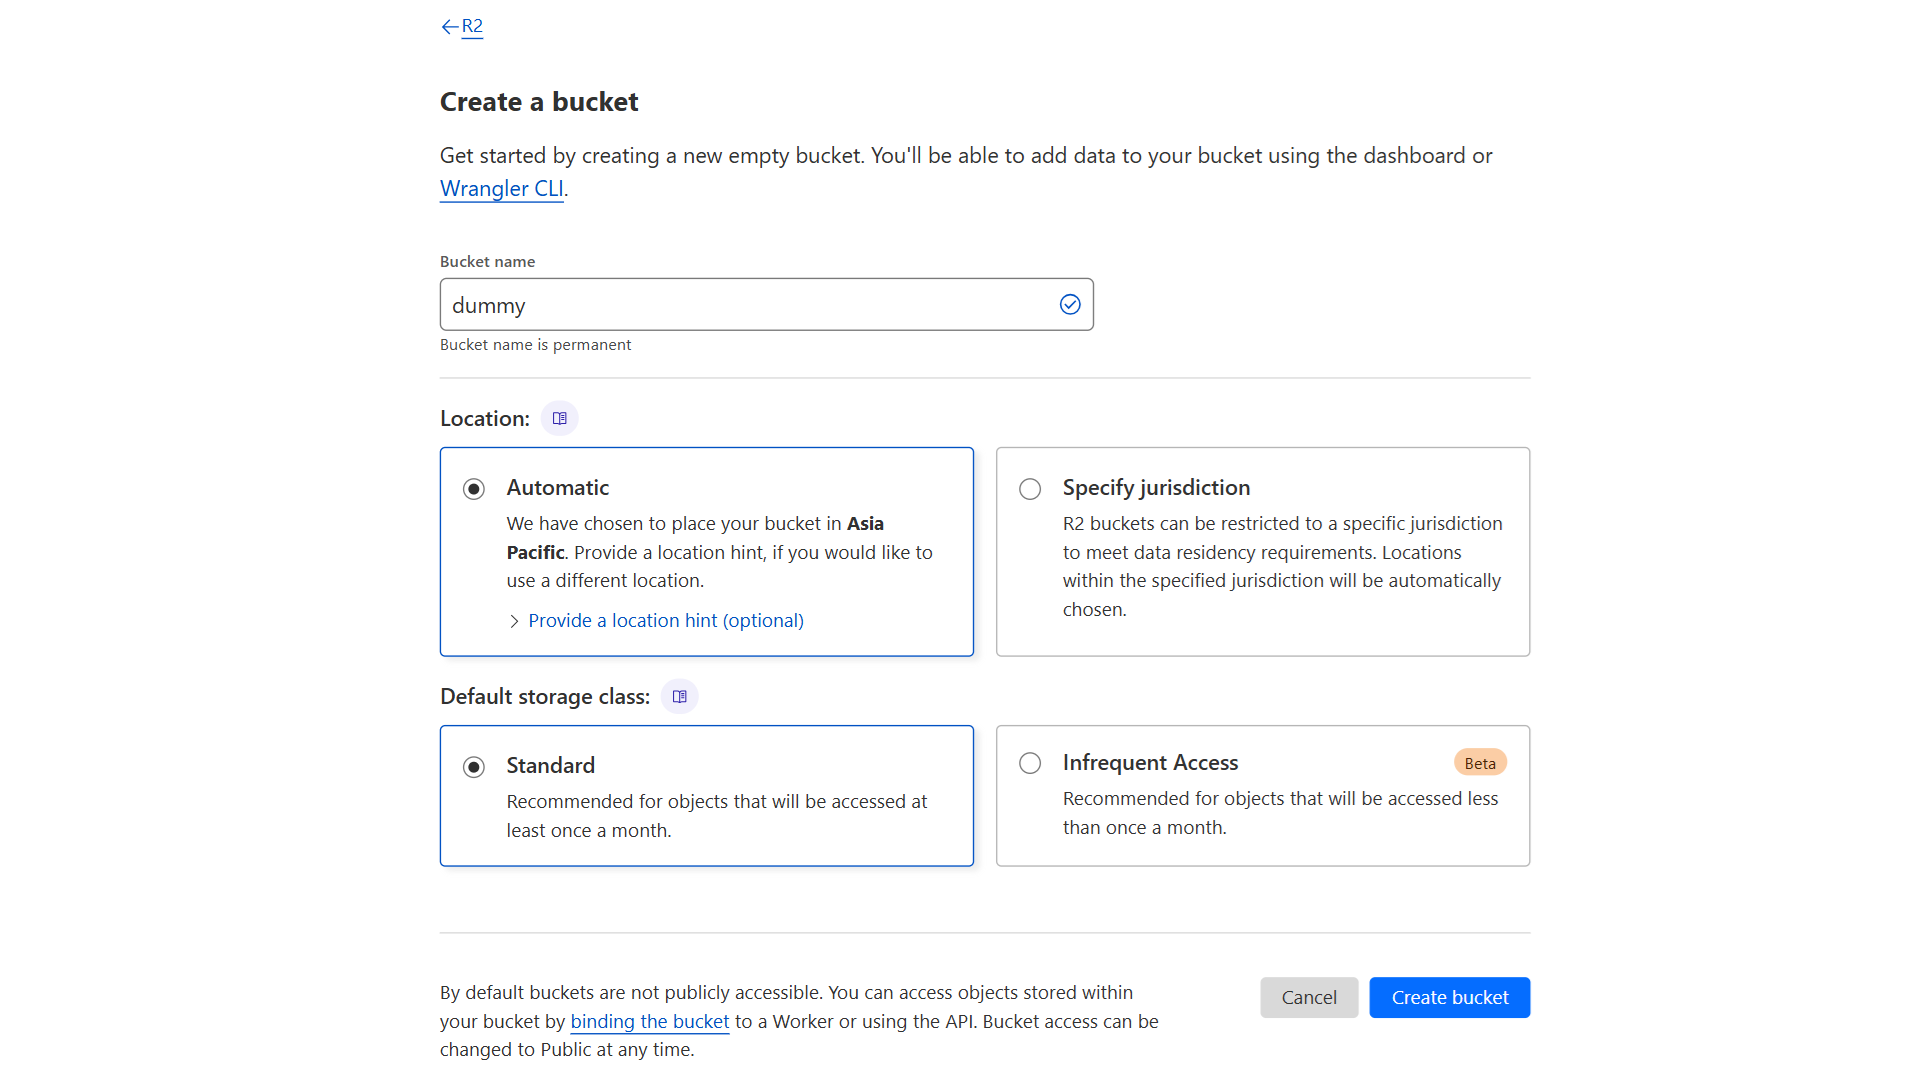
Next, type in your bucket name (usually your device codename). You can also set your bucket location.
Now that you’ve created your bucket, head to Settings tab and click Allow Access on the R2.dev subdomain section. This will activate your download URL.
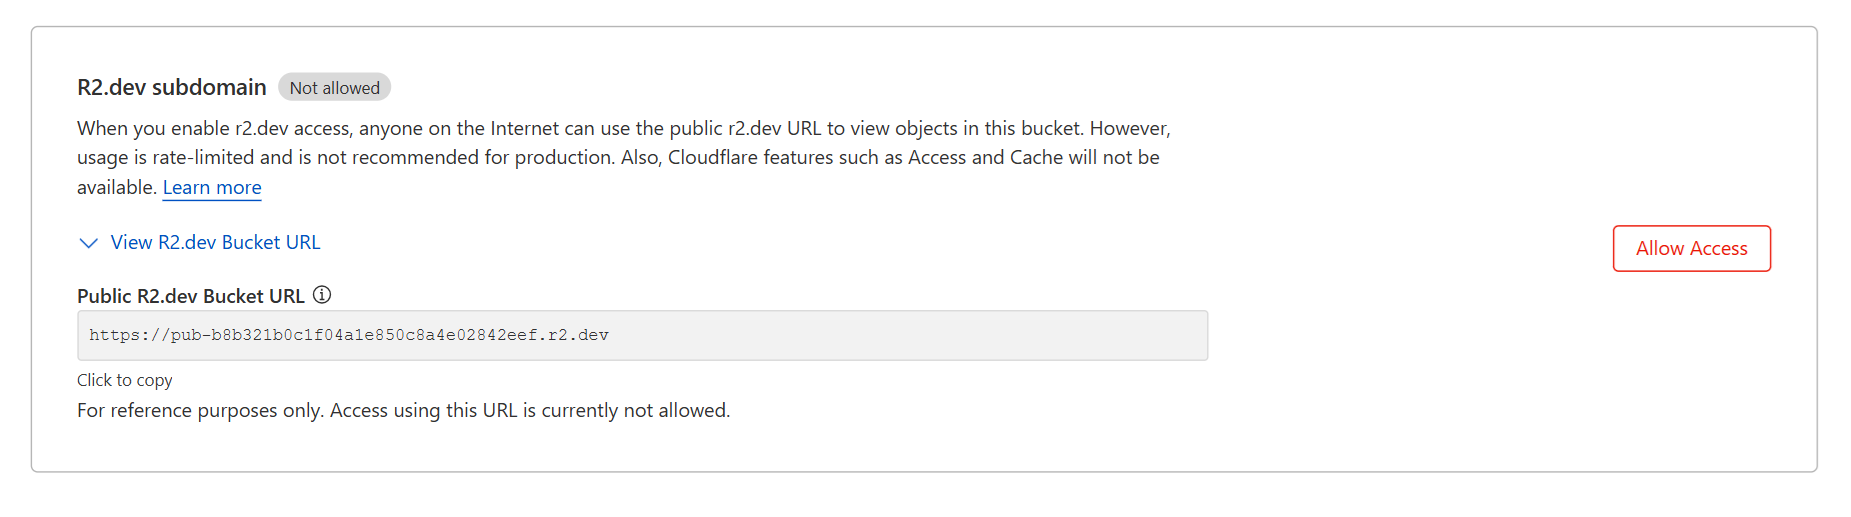
You will need this URL again in the next steps, so paste it to somewhere convinient.
🏭 Set up rclone to manage R2 buckets
Install rclone: To install rclone, run the following command:
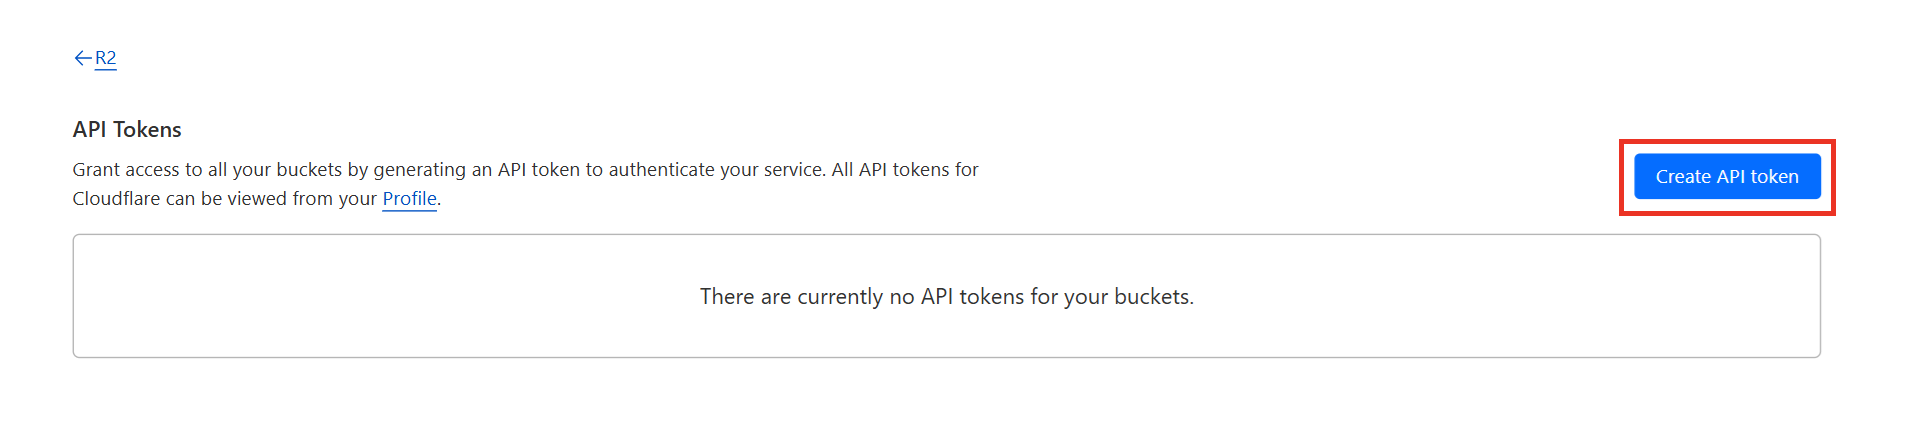
sudo -v ; curl https://rclone.org/install.sh | sudo bashAfter installing, head to R2 Object Storage overview page. Click API > Manage API tokens.

In order to interact with R2 API, you will need to generate an API token. Click Create API token.
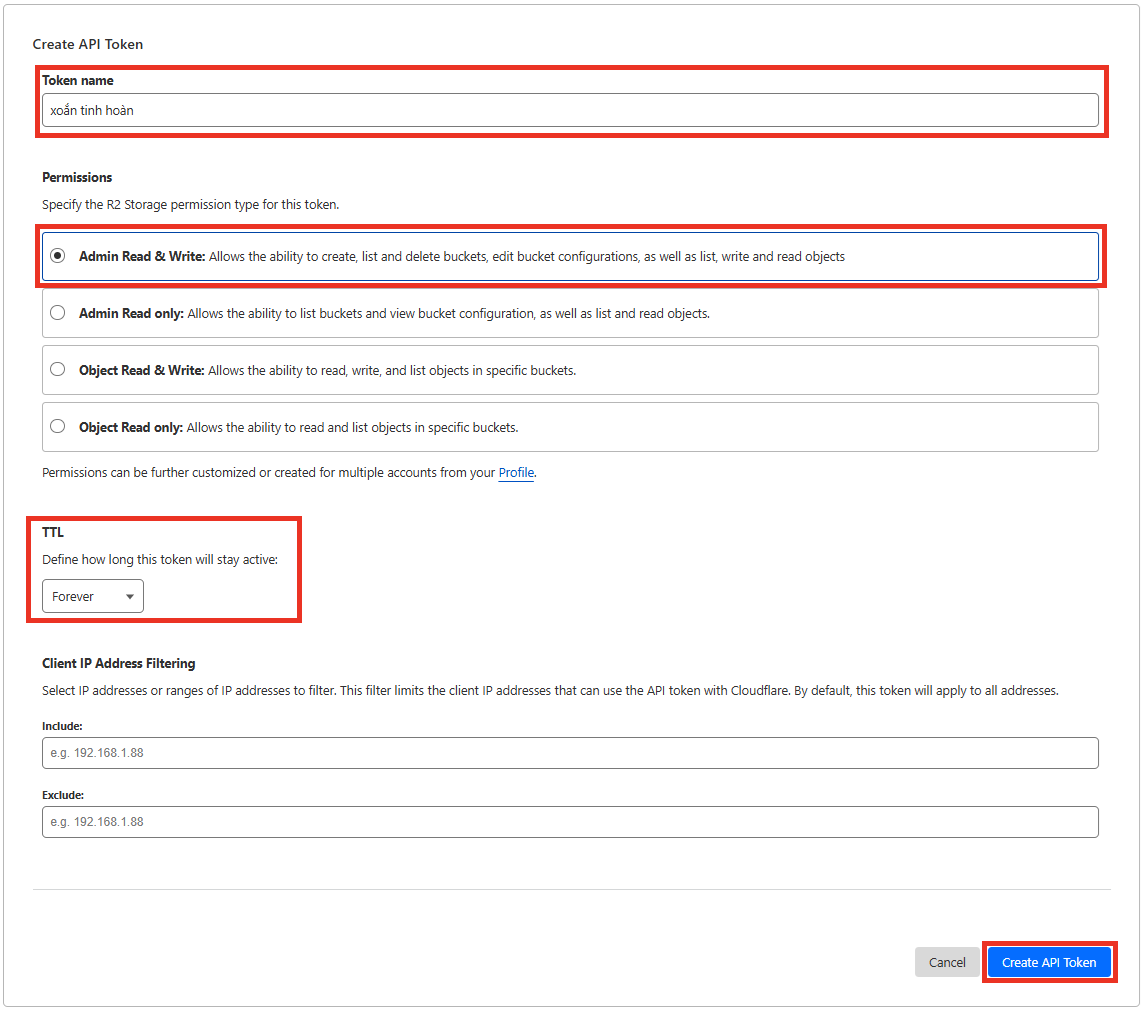
On the Create API token page, do as follows:
- Token name: Type in your desired token name.
- Permissions: Set the token’s permission to Admin Read & Write.
- TTL (Time To Live): Set how long your token will expire.
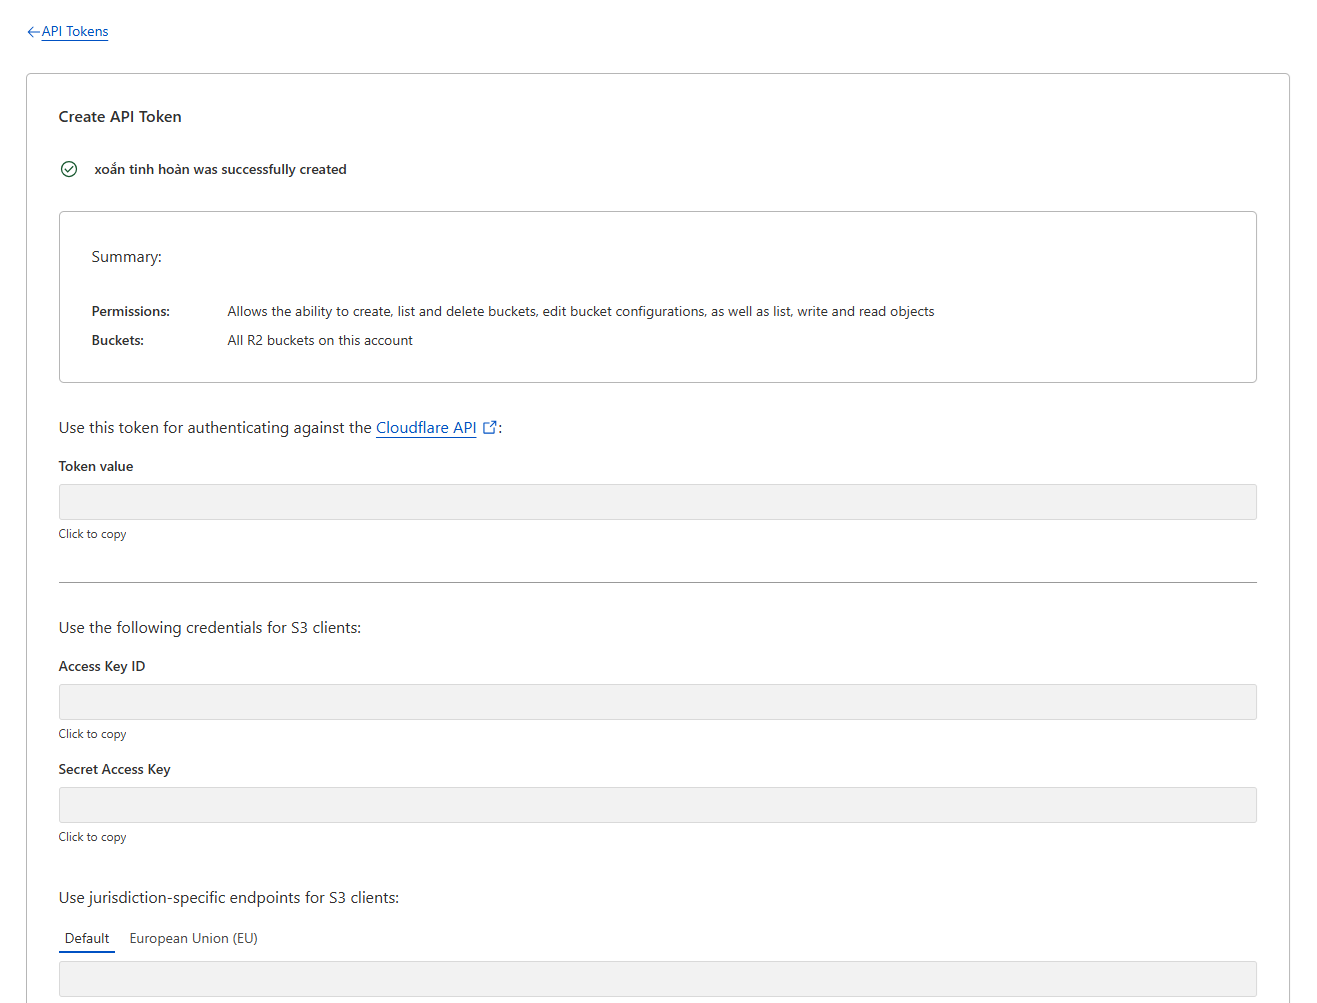
When you’re done, click Create API token.
Now you’ve created your new API token; however, for security reasons, this page is only showed once. DO NOT CLOSE THE TAB UNTIL YOU’VE DONE THE NEXT STEPS, or you’ll have to start over again!
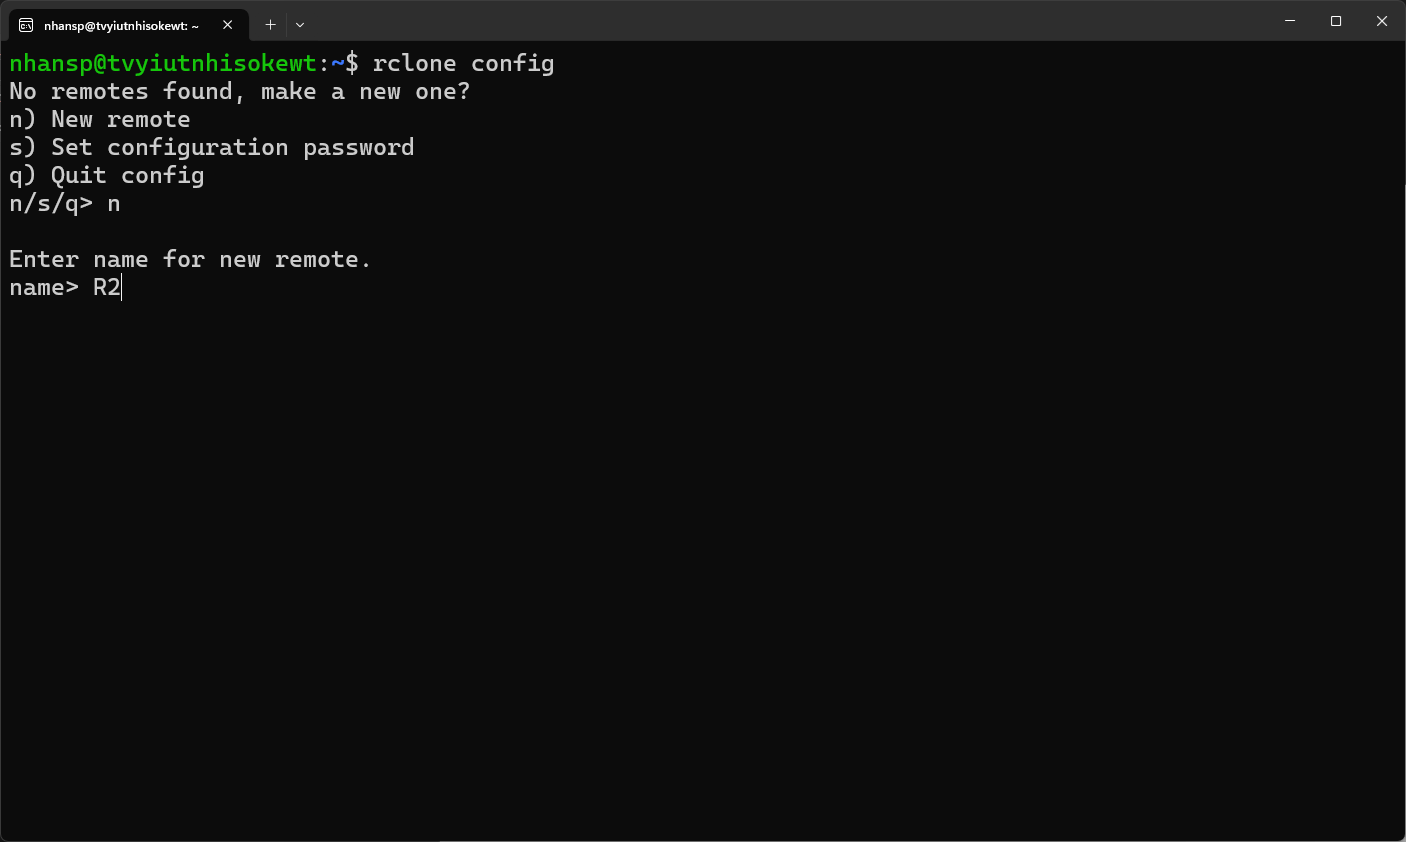
Head to terminal, type rclone config to start. Next, type n to create a new remote, then type in your remote name as desired.
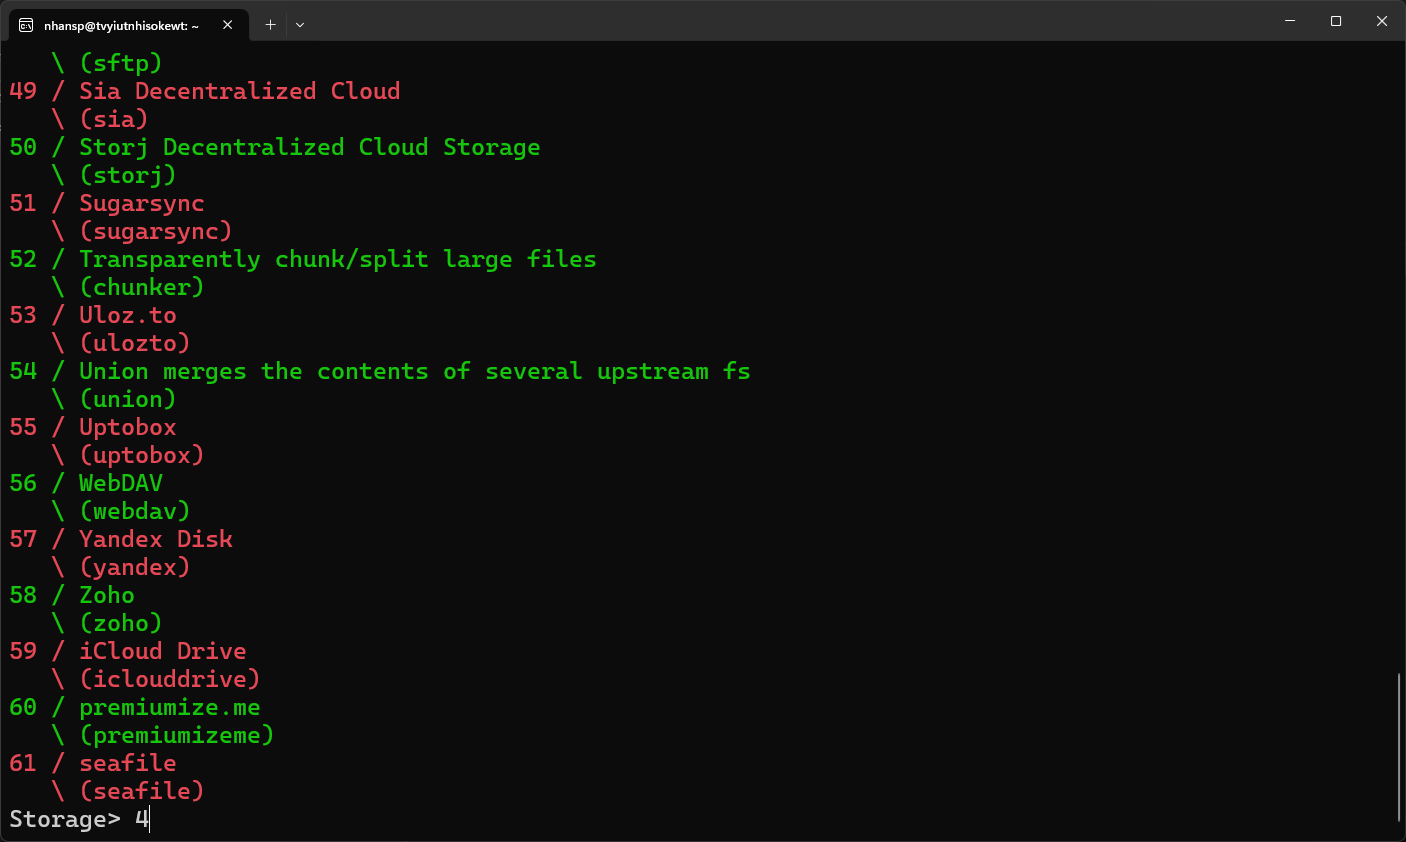
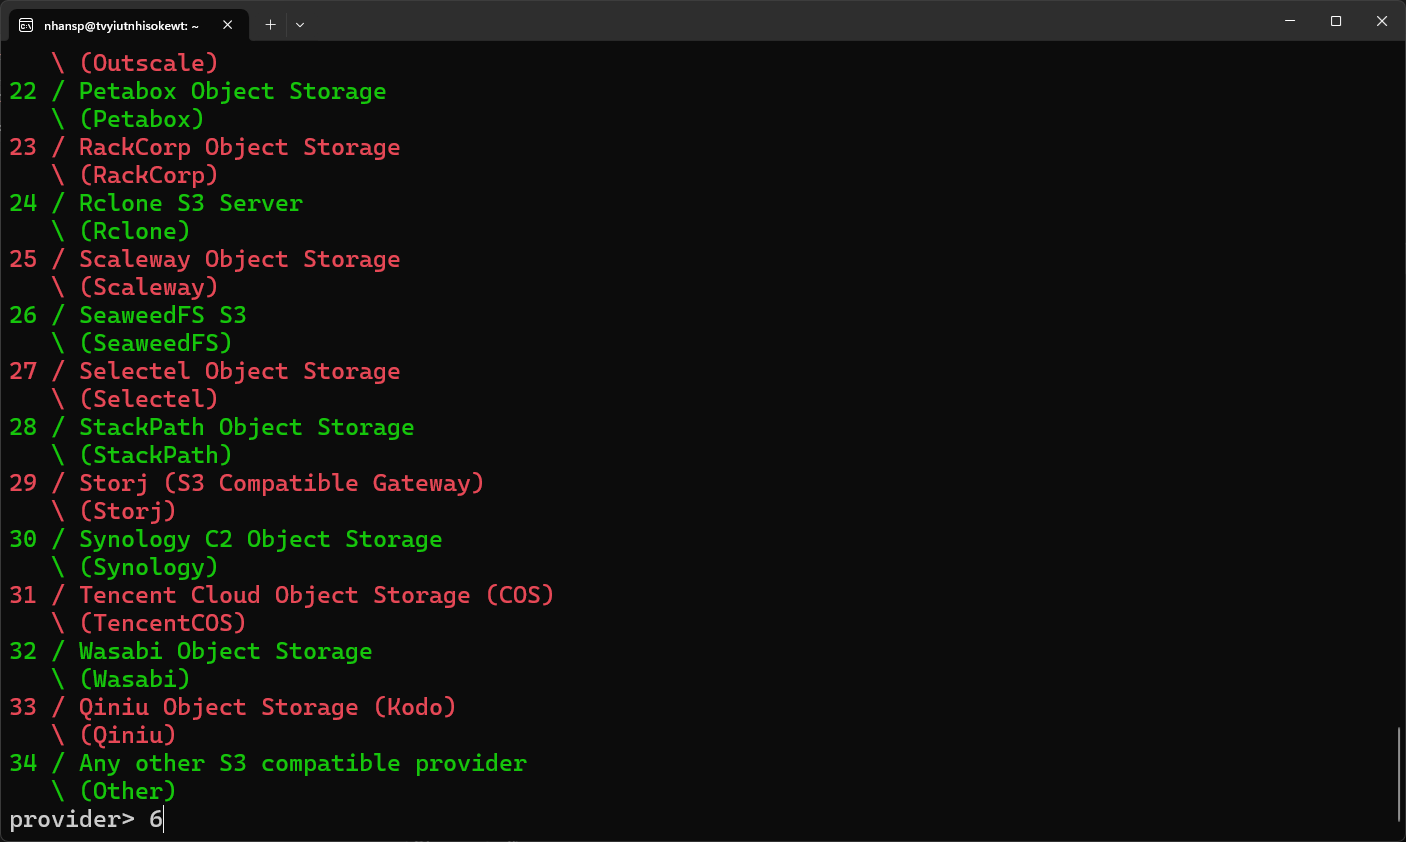
Storage: type 4 for Amazon S3 Compliant Storage Providers including (…), Cloudflare, (…) and others.
provider: type 6 for Cloudflare R2 Storage.
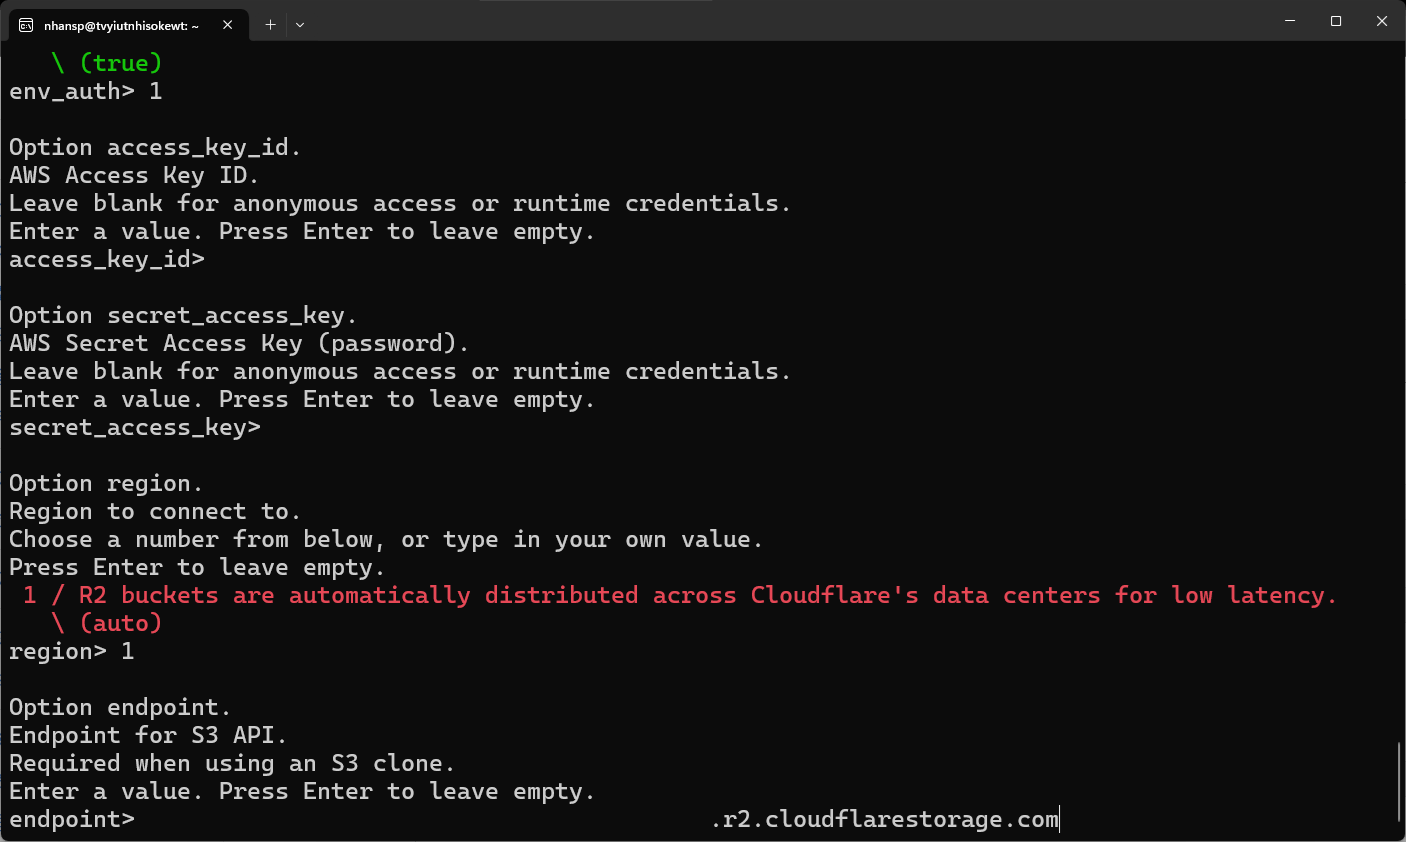
env_auth: type 1 to enter AWS credentials, then paste Access Key ID and Secret Access Key from API Token page.
region: type 1 to let Cloudflare manages bucket region settings.
endpoint: paste Use jurisdiction-specific endpoints for S3 clients URL.
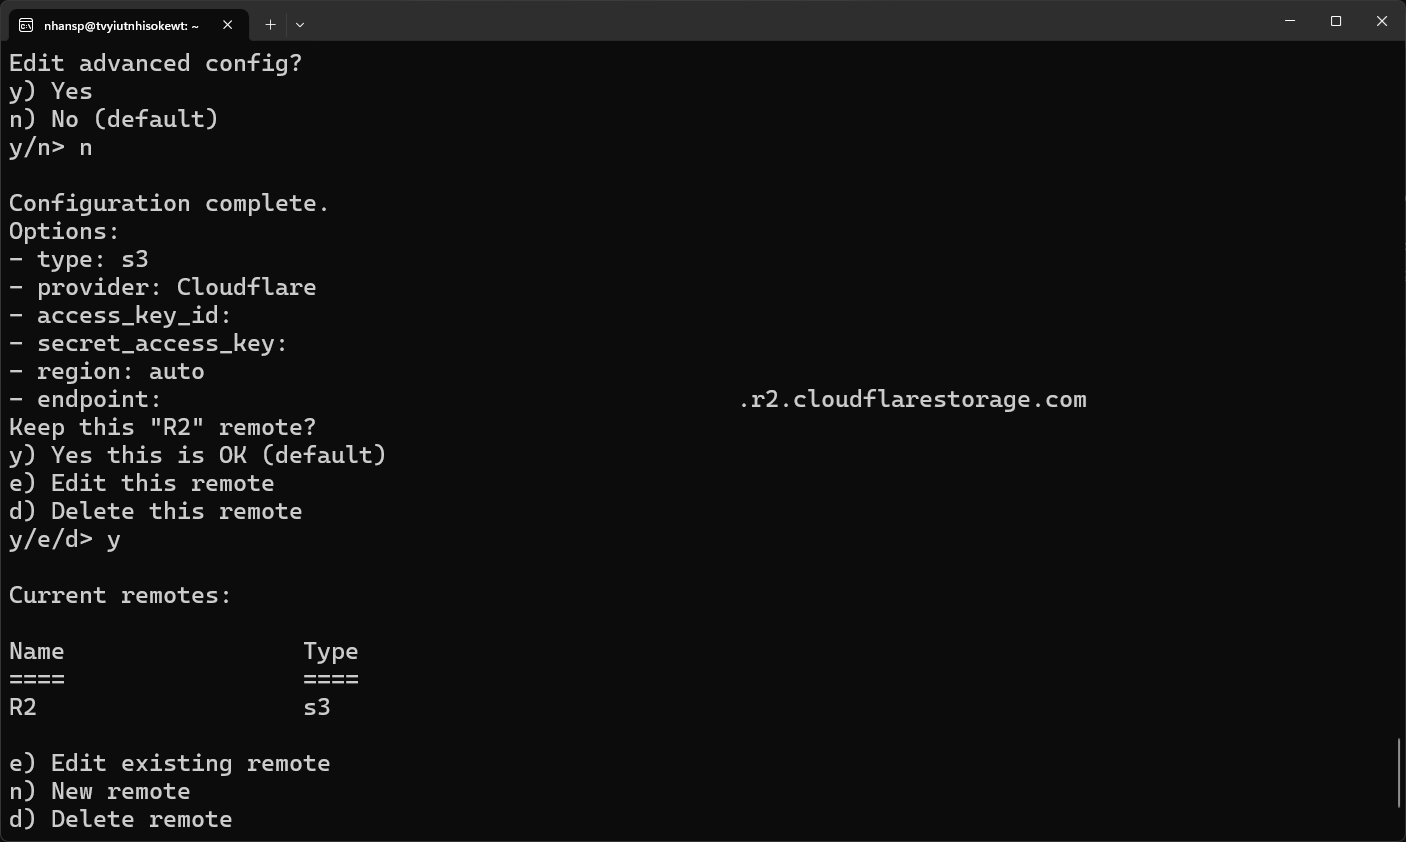
Finally, check again your configurations, then enter your choices to confirm.
⬆️ Build, upload builds and setup OTA repository
Same as Setting up custom OTA, but with extra rclone commands to upload your build.
Also, remember to modify download field in (device).json to include your download URL.
m evolutioncp out/target/product/(device)/(device).json /path/to/OTA_repo/builds/
rclone --min-size 0 delete r2:(bucket_name) # empty bucket to save storage, skip if you don't want to
rclone copy out/target/product/EvolutionX-...-(device)-...-Unofficial.zip r2:(bucket_name)For (device).json: Download URL will be https://pub-(...).r2.dev/EvolutionX-...-(device)-...-Unofficial.zip.
Refer to this json file from my builds for Pixel 6a (bluejay) :
{
  "response": [
    {
      "maintainer": "nhansp ft. yuuki",
      "oem": "Google",
      "device": "Pixel 6a",
      "filename": "EvolutionX-15.0-20250215-bluejay-10.3-Unofficial.zip",
      "download": "https://pub-4a686e4731f74758ab53df526a4fe7da.r2.dev/EvolutionX-15.0-20250215-bluejay-10.3-Unofficial.zip",
      "timestamp": 1739561704,
      "md5": "dee6d852e0fb05b3bfd068611fb5e519",
      "sha256": "53adf5d25295f3c4adb34347d4f1a4030f0dca6753b65d3b4ab9015ba3aa21b5",
      "size": 2339705212,
      "version": "10.3",
      "buildtype": "05.20",
      "forum": "https://tvyiutnhisokewt.github.io/bluejay",
      "firmware": "",
      "paypal": "",
      "telegram": ""
    }
  ]
}This is Android (Version) QPRx with (Month) (Year) security patches
Notes:
==============================
- LineageOS-based source. Signed build.
- Make sure to be on (device) firmware first.
- Clean flash is required if coming from March 2024 or older builds.
- Always dirty flash at your own risk. If your device bootloops, revert to an older build that boots.
- (Root advice)
- Play Integrity passes, RCS works (As of mm/dd/yyyy).
- Includes (brand) camera.
Device changes:
==============================
* (List all changes for your device, including modifications to the device kernel and vendor files.)
Notable ROM changes:
==============================
* (List all major changes made to the Evolution X project repositories.)git add . && git commit -m "(Device): Initial release" && git push✨ Congrats! Now your users can use OTA to update their devices.